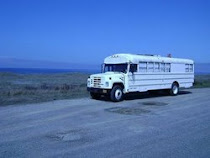
So lately we've been securing the bus for MOVEMENT!
That means lots of this: And this:
We also had yet another leaking incident. Same wall, different spot. Can't tell where or why but I can tell you that I caulkled the crap out of the left-hand side of my bus.
See each of those rivet lines? Well, there's caulk in them now.
We also finalized my sewing space!!
Can you believe I paired down my lace collection to just TWO tiny drawers? This down from 2 garbage-bags-full.
My treadle is secured with tie down points screwed into the floor joists and 2 tie downs through the cast iron base for driving. We had to choose our points wisely so that we didn't bend the base or put any undue pressure on sensitive parts of the cabinet. There's also a length of 2x2 on its side inbetween the two feet that rest along the wall. That should keep it from moving side-to-side (or from the bus' point of view, forwards and backwards).
Here is is with both tables open! A seamstress' dream. It's more room than most of us have to sew in "real" homes. I have an old cutting board to put on top of the opening in the treadle in case I want to put my electric machine or serger there instead.
I converted the 2nd sewing table (the plain one - NOT my redeye singer) into a storage cabinet. I found it - with old (*&#ed machine and all - on the sidewalk. Took it home, trashed the machine, put a false floor in it and now it's a table/cabinet. I have room for 2 baskets of notions underneath my thread holder!
We also made the wall opposite the sewing space GORGEOUS. Fabric on the right, coats, shoes and bags on the left:
From another angle:
Close-up of the purdy shoe holder I made in my new sewing space:
What it all looks like in context:
I also used my new sewing space to make cover-up curtains for the shelves. I think it makes it feel more tidy and organized. Out of sight, out of mind.
Here's another random DIY attempt of late: banjo case. Think fake velvet + cardboard + staples + old cushion insides + old towel + guerrilla tape + bent aluminum ribs + brads + webbing (for hinges) + ribbon (for closures)....the outside is even uglier than the inside but, hey, it works!
I'll leave you with a glam/bikerdyke shot of me next to our stowed table:
Wednesday, August 27, 2008
adventures in making the bus SECURE...and cute
Posted by Erin Gilday at 4:38 PM 5 comments
Tuesday, August 19, 2008
New Wrap Skirts at Patchwork Underground!
Quick plug for the biz: I posted a ton of brand new, super-cute wrap skirts today!
Check them out here: http://www.
Let me know what you think of the new site layout, too. I added a bunch of thumbnails to make everything easier to navigate. Hope you like it. =) Stay tuned for a new and improved gallery page.
Wishing you the best in late summer fun!
Posted by Julia at 1:23 PM 1 comments
Friday, August 8, 2008
Shelves, walls and doors
We've been busy bees these last few summer-end days. Getting out and working on the bus has felt really great after talking for weeks about the projects we want to get done but never having the time to do them. Every new thing we complete truly feels like a giant step towards getting our bus mobile. We've been focusing most of our energy on tying up loose ends, creating places to store all our "stuff" and securing everything for the coming earthquake of trundling down the road. We're gearing up to move to a new spot in Eugene hopefully within a few weeks.
In other news, we've been getting a chance to work on some exciting side-projects lately. Erin is writing a how-to article for Threads Magazine and she's also been working with Ecobuilding Collaborative of Oregon on a fiber-related research and design project. I've been doing some work with this website called The Point, dabbling in the world of online social network organizing - you can see my two campaigns on the bottom of our links, feel free to join if you're interested!
On to the pictures:
Here is part of our unfinished new wall. Drop dead gorgeous, right? =) We took out the three windows behind the wood stove and closet to help with keeping the bus cool/warm. Sheet metal on the outside again with our fancy recycled denim insulation and a moisture barrier. Then plywood. We'll put up more wonderboard before we use the stove.
Here's our new living room shelf.
Detail of our new securement for our main shelf. When we're driving, we'll put bungee cords up between these eyelets to keep all the stuff in. We have these funny metal grids we can weave into the bungees at certain spots, too. See all those sideways books? We'll put a metal grid over stuff like that to keep it from sliding inbetween the bungees. Erin wants to make some curtains to go over the shelves so that we don't have to look at piles of stuff all the time.
Framed in kitchen shelf!! We've been wanting this one for a long time. You don't realize how much of a difference it makes to actually have somewhere to put your things. We haven't decided how we want to finish it yet. Bungees? Doors? Hmmm....We have been wanting to invest in wooden plates and bowls for a while so that we don't have to worry about ceramic breaking. Yet to come.
Another angle of the kitchen cabinet.

The full "range hood" effect - we still need to replace the fan with a quieter one (ours sounds like an airplane taking off) and also install some mechanism for closing it off. We eventually want to decorate the heat shield....metal cutouts? Flowers? Circles? Decorative grille? Flames?
Our new bi-fold bathroom door that we got from Bring Recycling. The old one didn't work out too well because it was hollow, so the hinges didn't actually stay on. This one's solid wood and pretty classy. We even recessed the hinges into the wall. Oooo-ooo.
Interior view of our newly re-vamped bathroom. We put those cute shelves up (more shelves!) and fixed the whole composting chamber section (not shown). We basically had to re-do the whole thing. We took out the false floor that used to be there and lowered the buckets/trays to sit on the floor. That way, there was enough clearance for the whole funnel & fittings & hose apparatus for the diverter. Yay! Works a lot better. We ended up taking a gallon milk jug and cutting the bottom off, flipping it around, cutting off the handle and sealing off the hole and super gluing it onto a PVC coupler. Works good.
Posted by Erin Gilday at 2:29 PM 3 comments


